Join the Teckiy Community
Sign up for Free !!
World's first open source developer community with
Ticketing System
 0 reactions
In today’s data-driven landscape, the ability to capture, process, and store user-generated data in real-time is essential for many applications. This guide provides a detailed walk-through of creating an end-to-end application using Django for data capture, Kafka for real-time data streaming, Spark Streaming for processing, and Amazon S3 for storage.
Start with a Django project and app:
django-admin startproject user_feedback
cd user_feedback
python manage.py startapp feedback_realtime
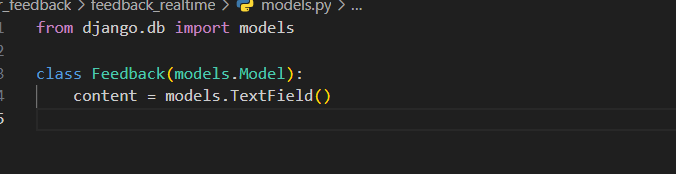
In feedback_realtime/models.py:
from django.db import models

class Feedback(models.Model):
    content = models.TextField()
Then, in feedback_realtime/forms.py:
from django import forms
from .models import Feedback

class FeedbackForm(forms.ModelForm):
    class Meta:
        model = Feedback
        fields = ['content']
feedback_realtime/views.py:
from django.shortcuts import render, redirect
from .forms import FeedbackForm

def feedback_view(request):
    if request.method == "POST":
        form = FeedbackForm(request.POST)
        if form.is_valid():
            form.save()
            return redirect('feedback_success')
    else:
        form = FeedbackForm()
    return render(request, 'feedback_realtime/feedback_form.html', {'form': form})

def feedback_success(request):
    return render(request, 'feedback_realtime/feedback_success.html')
feedback_realtime/urls.py:
from django.urls import path
from .views import feedback_view, feedback_success

urlpatterns = [
    path('feedback/', feedback_view, name='feedback_form'),
    path('feedback_success/', feedback_success, name='feedback_success'),
]
First, ensure there’s a directory named templates in the feedback_realtime app. Inside templates, create another directory named feedback_realtime.
feedback_form.html):
{% extends "base.html" %}

{% block content %}
  <h2>Feedback Form</h2>
  <form method="post">
    {% csrf_token %}
    {{ form.as_p }}
    <button type="submit">Submit Feedback</button>
  </form>
{% endblock %}
Feedback Success Template (feedback_success.html):
{% extends "base.html" %}

{% block content %}
  <h2>Thank you for your feedback!</h2>
{% endblock %}
Lastly, make sure to include the feedback_realtime app URLs in your main project's user_feedback/urls.py:
from django.urls import path, include

urlpatterns = [
    ...
    path('', include('feedback_realtime.urls')),
]
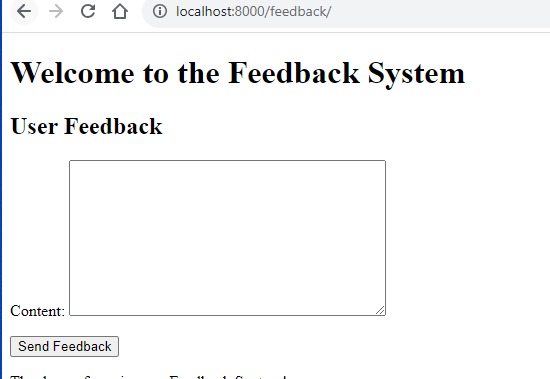
Run migrations, start the Django server, and you should now be able to access the feedback form at /feedback/ on your server.
Cool :) . Successfully we have designed our basic feedback form in Django. Now its time to Integrate Kafka into Django
Integrating Kafka into Django requires you to set up producers and possibly consumers in your Django application. We’ll focus on setting up a producer in the Django app to send messages (feedback) to a Kafka topic.
First, make sure you have Kafka and ZooKeeper installed. If using the official Kafka distribution:
Start ZooKeeper:
bin/zookeeper-server-start.sh config/zookeeper.properties
Start Kafka Server:
bin/kafka-server-start.sh config/server.properties
Install the Kafka Python Client:
You’ll need to install the confluent-kafka library which is a Kafka client for Python.
pip install confluent-kafka
kafka_config.py inside the feedback_realtime app:KAFKA_BROKER_URL = 'aws.kafka.url:9092' FEEDBACK_TOPIC = 'user_feedbacks'
Kafka Producer Utility:
Create a utility function to produce messages to Kafka. Let’s create a file named kafka_producer.py inside the feedback_realtime app:
# feedback_realtime/kafka_producer.py

from confluent_kafka import Producer
from .kafka_config import KAFKA_BROKER_URL, FEEDBACK_TOPIC

def acked(err, msg):
    """Callback for delivery reports."""
    if err is not None:
        print(f"Failed to deliver message: {msg.value()}: {err.str()}")
    else:
        print(f"Message produced to {msg.topic()}")

def produce_feedback(feedback_data):
    p = Producer({'bootstrap.servers': KAFKA_BROKER_URL})
    p.produce(FEEDBACK_TOPIC, key=str(feedback_data["id"]), value=str(feedback_data), callback=acked)
    p.flush()  # Wait for any outstanding messages to be delivered and delivery reports to be received.
Modify Django View:
Modify your feedback_view in views.py to send feedback to Kafka .
from django.shortcuts import render, redirect
from .forms import FeedbackForm
from .kafka_producer import produce_feedback
import json

def feedback_view(request):
    if request.method == 'POST':
        form = FeedbackForm(request.POST)
        if form.is_valid():
            feedback_instance = form.save()
            # Convert feedback instance to JSON and send to Kafka
            feedback_data = {
                "id": feedback_instance.id,
                "content": feedback_instance.content
            }
            produce_feedback(feedback_data)
            return redirect('feedback_form')
    else:
        form = FeedbackForm()
    return render(request, 'feedback_realtime/feedback_form.html', {'form': form})
With these modifications, every time a user submits feedback via the form, the feedback gets saved to your database and also sent to your Kafka topic named user_feedbacks in real-time.
spark-streaming-kafka package available.kafka_spark_stream_to_s3.py.
from pyspark.sql import SparkSession
from pyspark.sql.functions import current_date, date_format

spark = SparkSession.builder.appName("Kafka-S3-user-feedback-Streaming").getOrCreate()

# Define the Kafka parameters, topic name, and the Kafka broker (assuming localhost here).
kafkaStream = spark.readStream.format("kafka") \
    .option("kafka.bootstrap.servers", "KAFKA_URL:9092") \
    .option("subscribe", "user_feedbacks") \
    .load()

# Assuming the feedback messages are plain text; you can adjust for other formats.
rawValues = kafkaStream.selectExpr("CAST(value AS STRING)")

# Write to S3 in year/month/day format
query = rawValues.writeStream \
    .outputMode("append") \
    .format("parquet") \
    .option("path", "s3a://real-time-project-vengat/") \
    .option("checkpointLocation", "s3a://your_bucket_name/checkpoints/") \
    .partitionBy(date_format(current_date(), 'yyyy'), date_format(current_date(), 'MM'), date_format(current_date(), 'dd')) \
    .start()

query.awaitTermination()
<spark_version> with your Spark version.your_bucket_name with your S3 bucket name.spark-submit --packages org.apache.spark:spark-streaming-kafka-0-10_2.12:3.4.1 kafka_spark_stream_to_s3.py
While Celery is a prevalent choice for background tasks in Django, it might be overkill for specific use cases or perhaps doesn’t align with project requirements. For those situations, Python offers several ways to run background tasks. One such way is using Python threads.
Here’s how you can produce to Kafka in the background when a user submits feedback through Django, without the overhead of a task queue like Celery:
Python’s standard library offers the threading module which allows us to run functions as background threads:
from django.shortcuts import render, redirect
from .forms import FeedbackForm
from .kafka_producer import produce_feedback
import json
import threading

def kafka_producer_background(feedback_data):
    produce_feedback(feedback_data)

def feedback_view(request):
    if request.method == 'POST':
        form = FeedbackForm(request.POST)
        if form.is_valid():
            feedback_instance = form.save()
            # Convert feedback instance to JSON and send to Kafka
            feedback_data = {
                "id": feedback_instance.id,
                "content": feedback_instance.content
            }

            # Trigger Kafka producer as a background task
            thread = threading.Thread(target=kafka_producer_background, args=(feedback_data,))
            thread.start()

            return redirect('feedback_form')
    else:
        form = FeedbackForm()
    return render(request, 'feedback_realtime/feedback_form.html', {'form': form})
In this article, we explored a comprehensive real-time data processing pipeline, starting from a user interaction on a Django-based web application, through real-time message streaming using Kafka, to distributed data processing with Spark, and finally storing the processed data in the scalable cloud storage solution S3, structured by date.
year/month/day format.The integration of these technologies offers a scalable and robust solution for real-time data processing, suitable for various business needs — from simple web applications to complex ETL processes and analytics.
If you found this article insightful and wish to delve deeper into full-stack development or data engineering projects, I’d be thrilled to guide and collaborate further. Feel free to reach out through the mentioned channels below, and let’s make technology work for your unique needs.
Contact Channels:
Thank you for embarking on this journey with me through the realms of real-time data processing. Looking forward to our future collaborations.
0 reactions


